

 Animal Zoid Editorial Team
 ⚡ Quick Answer
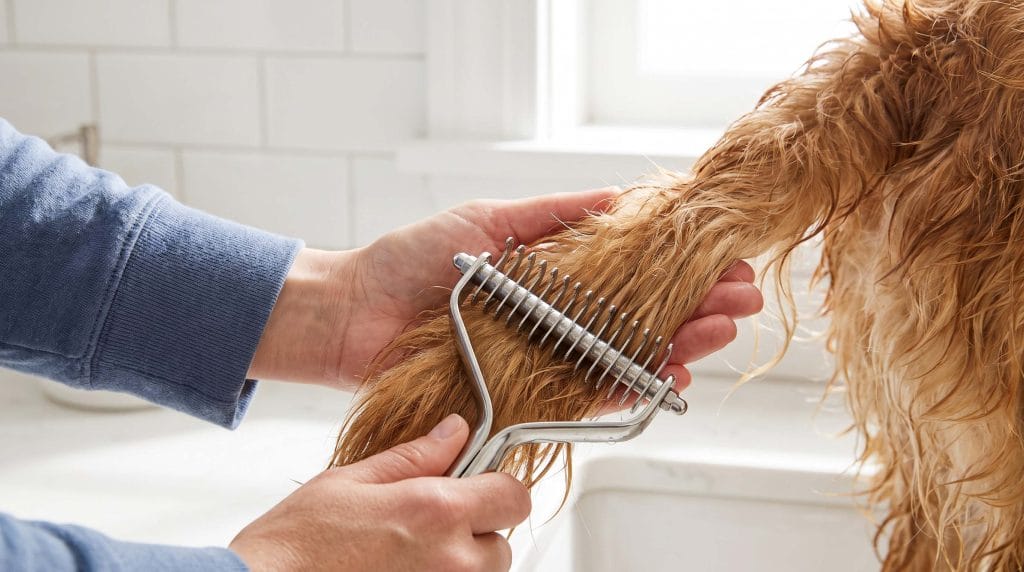
How to use an undercoat rake on a wet dog safely: work in short, gentle strokes following the direction of hair growth, keep the rake’s pins angled away from direct skin contact, and never force it through tangled or matted sections while wet, since wet hair stretches more and tears more easily than dry hair. Wait until the coat is towel-dried to at least damp rather than soaking wet, and always test pressure on a small area first before working through the full coat.
Pulling out an undercoat rake right after a bath seems like efficient multitasking — the coat’s already wet, the loose hair is already loosened, why not knock out two jobs at once? Except how to use an undercoat rake on a wet dog safely isn’t quite as simple as running the same dry-coat technique through soaking wet fur, and getting it wrong leads to scratched skin, painful pulling, and a dog who dreads grooming sessions going forward.
We’ve walked through this exact question with plenty of pet owners eager to speed up their grooming routine, and the short version is: it can be done safely, but only with real adjustments to technique, timing, and pressure. This guide covers how to use an undercoat rake on a wet dog safely, why wet coats behave so differently under a rake than dry ones, the specific mistakes that cause injury, and when it’s genuinely better to wait until the coat dries first.
Why Wet Coats Change Everything About Undercoat Rake Safety
Before getting into how to use an undercoat rake on a wet dog safely, it’s worth understanding exactly why wet hair behaves so differently than dry hair under a metal-pinned tool. Hair, like most keratin-based structures, absorbs water and swells slightly, which temporarily weakens its internal structure. Wet hair stretches further before breaking, but it also tears and snaps more easily under sudden tension than dry hair does.
This matters enormously for a tool like an undercoat rake, which works by catching loose undercoat hair on its pins and pulling it free from the coat. On dry hair, that pulling motion targets hair that’s already loose and ready to release. On wet hair, the same motion can catch onto hair that’s still anchored and pull it out prematurely, or worse, drag the pin tips directly against wet, softened skin that offers less natural resistance than dry skin does.
The Skin Sensitivity Factor Most Guides Skip
Here’s something that rarely gets mentioned clearly: wet skin is measurably more sensitive to mechanical pressure than dry skin. Water softens the outermost layer of skin, reducing its natural resistance to friction and pressure. A rake stroke that would feel like normal grooming pressure on dry skin can feel considerably more intense, even mildly painful, on the same spot when the skin is wet. This is part of why dogs sometimes react more sensitively to raking during or immediately after a bath than they do during a completely dry grooming session.
Step-by-Step: How to Use an Undercoat Rake on a Wet Dog Safely
Here’s the actual technique, adjusted specifically for the challenges wet fur presents.
Step 1: Towel-Dry to Damp, Not Soaking Wet
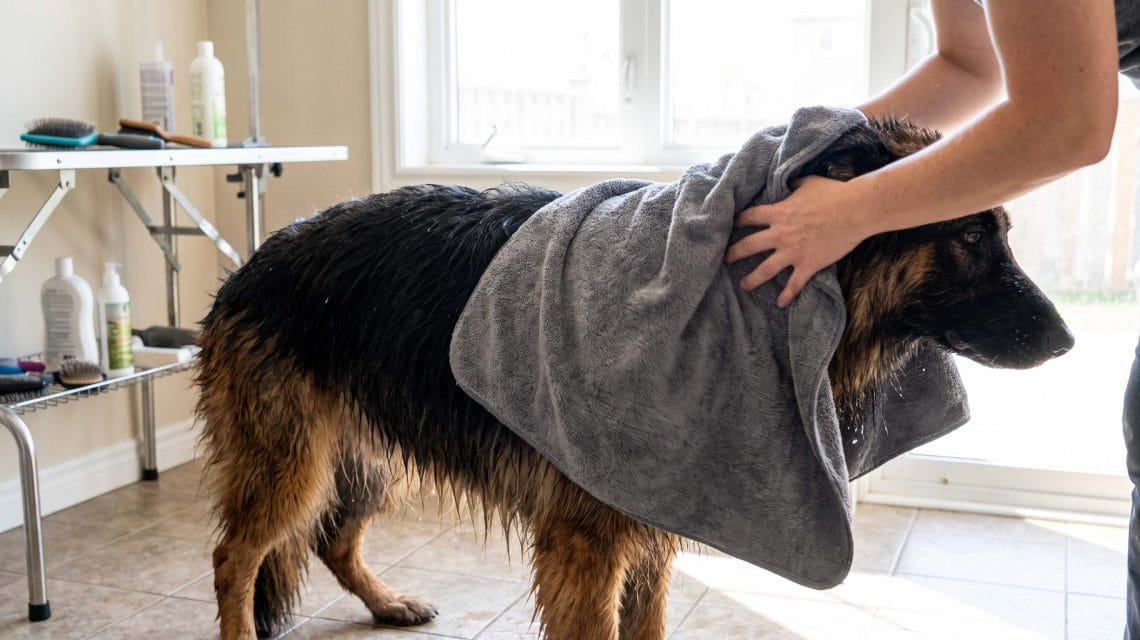
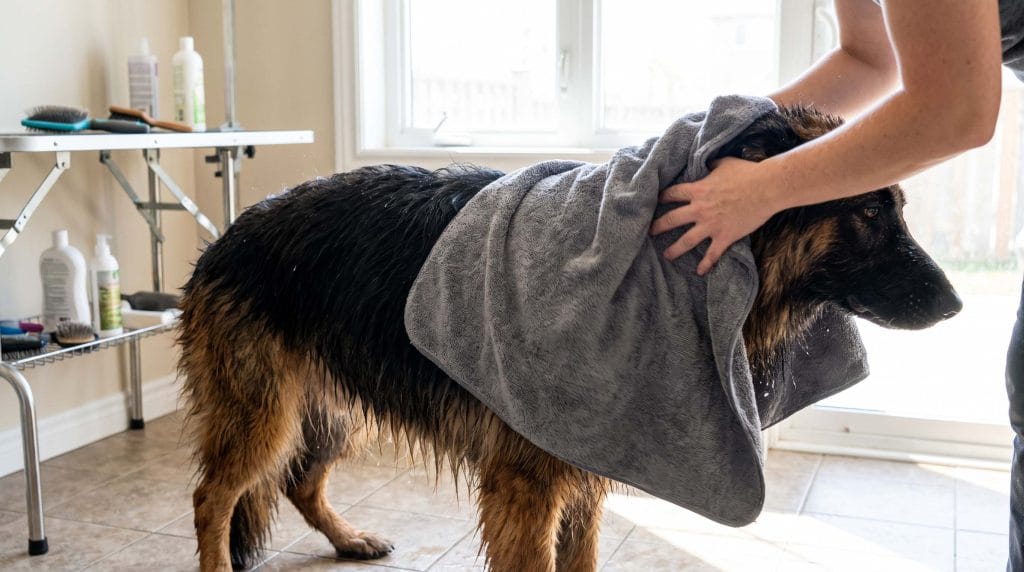
Never attempt to rake a coat that’s still dripping or fully saturated. Towel-dry thoroughly first, aiming for a damp, no-longer-dripping coat rather than one that’s still heavy with water. This reduces both the excess swelling in individual hair shafts and the slipperiness that makes controlling rake pressure difficult on a soaking coat.
Step 2: Choose a Rake With Rounded, Not Sharp, Pin Tips
Not all undercoat rakes are built the same, and pin tip design matters considerably more on wet coats than dry ones. Rounded, ball-tipped pins reduce the risk of accidental skin contact injury compared to sharper, more angular pin designs. If you’re specifically planning to rake wet or damp coats regularly, investing in a rake designed with this safety feature in mind is worth the small price difference.
Step 3: Work in the Direction of Hair Growth Only
This matters on dry coats too, but it becomes non-negotiable on wet ones. Raking against the direction of natural hair growth increases the chance of catching and pulling anchored hair rather than loose hair, and on a wet coat, that anchored hair offers less resistance before either snapping or pulling uncomfortably at the skin.
Step 4: Use Short, Controlled Strokes Instead of Long Passes
Long, sweeping rake strokes work reasonably well on dry coats, where you can feel resistance building gradually as the rake encounters denser sections. On wet coats, that resistance feedback is muted because the coat is slicker and less structured. Short, controlled strokes, checked frequently, let you monitor how much hair is coming free and how the dog is responding, rather than committing to a long stroke that might catch something unexpected halfway through.
Step 5: Test Pressure on a Small Area First
Before working through the full coat, test the rake’s pressure on a small, low-sensitivity area like the shoulder or upper back. This lets you calibrate how much pressure feels appropriate on the wet coat specifically, since it typically needs noticeably lighter pressure than the same coat would need dry.
Step 6: Stop Immediately at Any Sign of Discomfort
Watch for pulling away, flinching, or vocalizing during the process. Wet-coat raking should never cause visible discomfort, and any sign of it means either the pressure is too high, the rake is catching anchored hair rather than loose hair, or the coat needs more time to dry before continuing.
Comparison Table: Wet Coat vs. Dry Coat Raking Considerations
| Factor | Wet Coat | Dry Coat |
|---|---|---|
| Hair structure | Swollen, more prone to snapping under tension | Normal structure, more predictable resistance |
| Skin sensitivity | Higher — softened skin, less natural resistance | Lower — normal skin resistance |
| Resistance feedback | Muted, harder to gauge hair density | Clear, easier to feel dense sections |
| Recommended stroke length | Short, controlled | Longer passes acceptable |
| Pressure needed | Lighter than usual | Standard pressure |
| Best pin type | Rounded, ball-tipped | Standard or rounded both work |
Which Breeds Benefit Most From Learning How to Use an Undercoat Rake on a Wet Dog Safely
Not every dog needs wet-coat raking as part of a grooming routine, but for certain breeds, doing it correctly saves significant time.
Heavy double-coated breeds — Huskies, Samoyeds, German Shepherds, Golden Retrievers — carry enough undercoat volume that combining bath time with careful raking can meaningfully reduce total grooming time, since a portion of the loose hair that would otherwise need separate brushing gets addressed during the bath and drying process itself.
Breeds prone to matting — Corgis, some Retriever mixes — benefit from wet-coat raking specifically because catching loose undercoat before it dries reduces the raw material available for new mats to form during the drying process.
For lighter-shedding or single-coated breeds, wet-coat raking usually isn’t necessary, since there’s simply less undercoat volume to justify the extra care and risk involved. Our guides on Husky shedding management, German Shepherd shedding, and Corgi shedding go into more detail on which specific tools work best for each coat type, both wet and dry.
Common Mistakes People Make Trying to Use an Undercoat Rake on a Wet Dog Safely
Raking a fully soaked, dripping coat. As covered earlier, hair swelling and skin sensitivity are both at their peak on a soaking coat. Always towel-dry to damp first.
Using the same pressure as dry-coat raking. Wet coats need noticeably lighter pressure, and applying dry-coat pressure levels to a wet coat significantly increases injury risk.
Raking against the direction of hair growth. This increases resistance and catching risk under any circumstances, but the consequences are more pronounced on wet, weakened hair shafts.
Forcing the rake through tangled or matted sections while wet. Wet mats are considerably harder to work through safely than dry ones, since the hair inside a wet mat has less structural integrity and snaps rather than gradually loosening. Address significant mats with detangling spray and patience once the coat is dry, or consult a professional groomer for severe matting.
Ignoring early signs of discomfort. Continuing past a flinch or pull-away response, assuming the dog is just being fussy, risks real skin injury and damages trust in future grooming sessions.
Using a rake with worn or bent pins. Damaged pins can catch unpredictably and cause more skin contact than a well-maintained tool would, which matters even more on already-sensitive wet skin.
Elena’s Story — Learning the Hard Way With a Golden Retriever
One of the pet owners in our community, Elena, has a Golden Retriever named Max and started raking his coat immediately after baths as a way to save time, reasoning that the wet, loosened hair would come out even easier than during a dry brushing session. For the first few sessions, this seemed to work reasonably well, and Elena assumed she’d found an efficient new routine.
On the fourth or fifth attempt, Max flinched sharply during a pass along his hindquarters, and Elena noticed a small red mark on his skin afterward. Nothing serious, but clearly uncomfortable for him, and Max became noticeably more reluctant to sit still for post-bath grooming sessions going forward, a hesitation that took weeks of gentler handling to fully undo.
A groomer explained what had likely happened — Elena had been using the same firm pressure she used during dry brushing sessions, not accounting for how much more sensitive Max’s wet skin was to that same pressure level. Once Elena adjusted her technique, towel-drying Max to damp rather than wet before raking, using noticeably lighter pressure, and working in short, controlled strokes rather than long sweeping passes, the process went smoothly again. Max’s trust in the process took a little longer to rebuild than the technique itself did, which was the part Elena found most frustrating in hindsight — a small technique mistake had a bigger emotional cost than she expected.
🐾 Something Worth Knowing About Timing Within the Drying Process
Here’s a detail that doesn’t come up often: there’s actually a specific window during the drying process, somewhere between fully wet and fully dry, where raking tends to work best and feel most comfortable for the dog. Right after a bath, the coat is too saturated and the skin too soft for ideal raking. Once fully dry, you’re back to standard dry-coat technique, which works fine but loses the slight advantage wet hair offers in terms of loosened, easier-to-catch undercoat.
The sweet spot sits somewhere in the middle of the drying process — coat feels damp to the touch but no longer heavy with water, skin has firmed back up somewhat from its soaked state, and loose undercoat is still more readily accessible than it would be on a fully dry coat. This window typically falls about 20 to 40 minutes into air drying for most double-coated breeds, depending on ambient humidity and airflow. Catching this window, rather than raking immediately post-bath or waiting until fully dry, tends to produce both the most comfortable experience for the dog and the most efficient hair removal for the owner.
Best Practices for Long-Term Wet-Coat Raking Success
- Always towel-dry to damp before starting, never work on a soaking wet coat.
- Use noticeably lighter pressure than dry-coat sessions, testing on a small area first each time.
- Choose a rounded-pin rake specifically for wet coat work, keeping a separate standard rake for dry sessions if preferred.
- Work in short strokes and check in frequently, rather than committing to long passes.
- Time the session for the damp-not-soaked window, roughly 20 to 40 minutes into air drying for most double-coated breeds.
- Stop at any sign of discomfort and reassess, rather than pushing through to finish a section.
For a complete picture of drying and grooming double-coated breeds without specialized equipment, our guide on drying a double-coated dog without a high velocity dryer pairs well with the wet-coat raking technique covered here, since both rely on similar section-by-section, damp-coat handling principles.
Tools Worth Having for Safe Wet-Coat Grooming
- Rounded, ball-tipped undercoat rake — specifically designed to reduce skin contact risk
- Highly absorbent microfiber towels — gets the coat to the ideal damp, not soaking, state faster
- Detangling spray — helps work through any small tangles without needing aggressive rake pressure
- A grooming table or non-slip mat — keeps the dog stable and comfortable during the process, reducing sudden movements that increase injury risk
- A slicker brush as a gentler backup — useful for sensitive areas where rake pressure feels like too much even at its lightest setting
What’s Changing in Wet-Coat Grooming Tools
Grooming tool manufacturers have started designing rakes specifically marketed for wet or damp coat use, featuring softer, more flexible pin materials that reduce injury risk compared to traditional rigid metal pins. Several professional-grade grooming lines have introduced dual-purpose tools with interchangeable heads, allowing a switch between a wet-coat-safe attachment and a standard dry-coat attachment on the same handle.
Veterinary and professional grooming education has also placed more emphasis in recent years on coat and skin physiology during wet conditions, moving away from generic “brush after bathing” advice toward the kind of specific, pressure-calibrated technique covered throughout this guide. This shift reflects growing recognition that wet-coat grooming isn’t simply dry-coat grooming with extra water involved — it’s a genuinely different process requiring its own set of adjustments.
Key Takeaways for Safe Wet-Coat Raking
- Towel-dry to damp, never rake a fully soaked coat
- Use lighter pressure than standard dry-coat raking
- Choose a rounded-pin rake designed for wet or sensitive skin use
- Work only in the direction of hair growth
- Use short, controlled strokes and check in frequently
- Time the session for the damp-not-soaked window, roughly 20-40 minutes into drying
- Stop immediately at any sign of discomfort or flinching
- Never force the rake through wet, tangled, or matted sections
FAQ — How to Use an Undercoat Rake on a Wet Dog Safely
Is it actually safe to use an undercoat rake on a wet dog at all?
Yes, with the right adjustments. Towel-drying to damp rather than soaking wet, using lighter pressure, and choosing a rounded-pin rake all make wet-coat raking considerably safer than attempting it on a fully saturated coat with standard dry-coat technique.
When during the drying process is best for using an undercoat rake safely on a wet dog?
The ideal window falls roughly 20 to 40 minutes into air drying, once the coat feels damp rather than soaking but before it’s fully dry. This balances loosened undercoat accessibility with firmer, less sensitive skin.
Can raking a wet dog cause skin damage?
Yes, if pressure is too high or the rake has sharp, angular pin tips. Wet skin is softer and more sensitive to mechanical pressure than dry skin, which is why lighter pressure and rounded pin tips matter specifically for wet-coat sessions.
Should I rake a wet dog if the coat has mats?
No, not directly through the mats. Wet, matted hair has less structural integrity and tends to snap rather than loosen safely. Work out mats with detangling spray once the coat is dry, or consult a professional groomer for significant matting.
What type of undercoat rake is safest for wet coats?
A rake with rounded, ball-tipped pins rather than sharp, angular ones reduces skin contact risk significantly, making it the better choice specifically for wet or damp coat sessions.
Getting the Technique Right
How to use an undercoat rake on a wet dog safely comes down to respecting the real physical differences between wet and dry hair and skin, not just running the same dry-coat routine on a damp coat. Lighter pressure, rounded pin tips, short controlled strokes, and the right timing within the drying window all combine to make this a genuinely useful technique rather than a risky shortcut.
For more on managing double coats through every stage of the bath and grooming process, check out our guides on drying a double-coated dog without a high velocity dryer, Husky shedding, German Shepherd shedding, Golden Retriever shedding, and our complete shedding management guide to build a grooming routine that works with your dog’s coat and comfort, not against it. 🐾
This article provides general grooming guidance for informational purposes. If your dog shows signs of skin sensitivity, irritation, or pain during grooming, consult a veterinarian or professional groomer for hands-on evaluation.
