

 Animal Zoid Editorial Team
 ⚡ Quick Answer
How to blow out a Golden Retriever coat at home: use a high velocity or strong pet dryer set to force air against the direction of hair growth while brushing simultaneously with a slicker brush or undercoat rake. This combination physically separates and ejects loose undercoat from the base of the coat, rather than just drying the surface. Work in sections, starting at the neck and working back, and expect to remove a genuinely shocking amount of loose hair in a single thorough session.
Anyone who’s watched a groomer blow out a Golden Retriever’s coat has probably had the same reaction — pure disbelief at how much hair comes flying off a dog that looked perfectly normal minutes earlier. Learning how to blow out a Golden Retriever coat at home means replicating that exact process without a salon appointment, and it’s genuinely achievable with the right equipment and technique, even if it takes longer than a professional setup.
We’ve walked plenty of Golden Retriever owners through building this into their regular routine, and it consistently becomes one of the most effective tools against the sheer volume of hair these dogs produce. This guide covers how to blow out a Golden Retriever coat at home step by step, why this technique removes so much more hair than a standard bath and brush, the equipment differences that actually matter, and the mistakes that turn a productive session into a frustrating one.
What “Blowing Out” a Golden Retriever Coat Actually Means
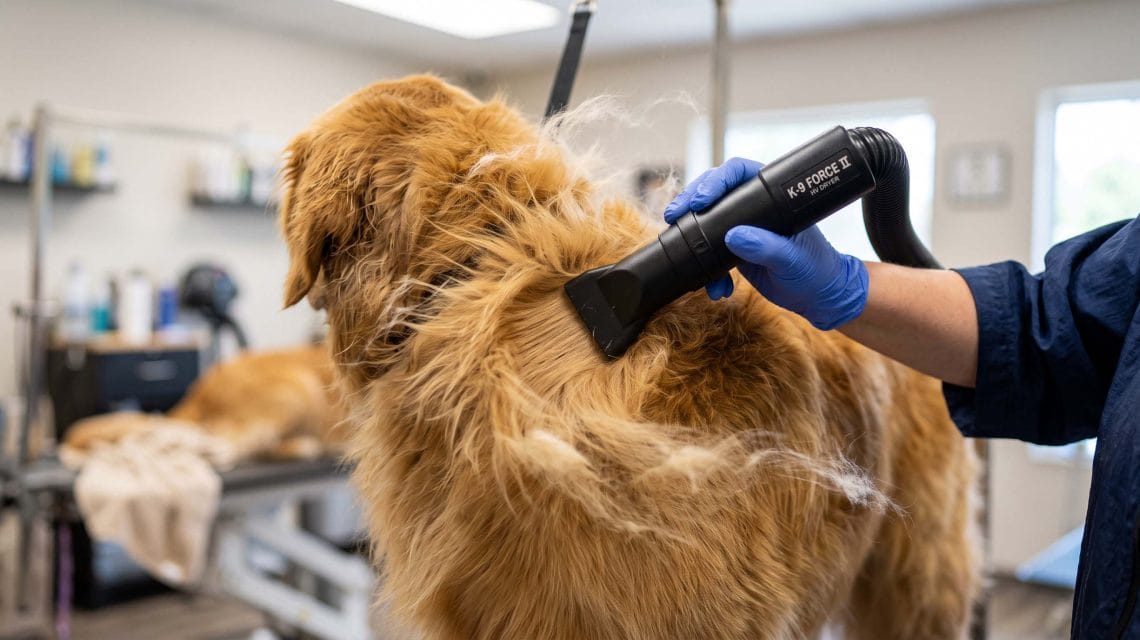
Before covering how to blow out a Golden Retriever coat at home, it’s worth understanding what separates this technique from a regular bath and dry. A standard drying process moves air across the surface of the coat to evaporate moisture. Blowing out a coat is a different goal entirely — it uses forced air, applied against the direction of hair growth, to physically separate the undercoat from the guard coat and push loose, dead hair completely out of the coat structure.
Golden Retrievers are ideal candidates for this technique specifically because their double coat holds an enormous volume of dense, soft undercoat beneath the longer, water-resistant guard hairs. That undercoat sheds constantly and gets trapped against the skin unless something actively works it loose. Regular brushing removes some of it, but forced air combined with brushing removes dramatically more, since the air pressure itself does work that brushing alone can’t fully accomplish.
Why Air Direction Changes Everything
Here’s the detail that makes or breaks how to blow out a Golden Retriever coat at home: air needs to move against the direction hair naturally lies, not with it. Air moving with the coat’s natural direction just glides over the surface. Air forced against the grain lifts the guard coat, penetrates down to the undercoat, and physically dislodges hair that’s ready to release but hasn’t yet worked its way to the surface on its own.
Equipment That Determines Whether You Can Blow Out a Golden Retriever Coat at Home Effectively
The tool you’re using matters more for this technique than almost any other grooming task, since the entire method depends on airflow strength.
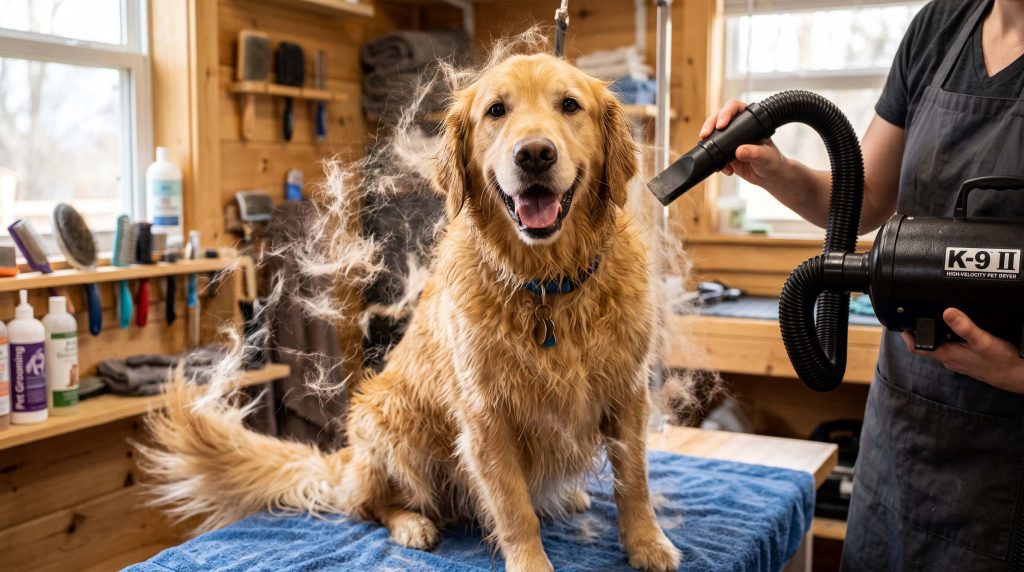
Professional high velocity dryers produce airflow in the range of 4,000 to 8,000 feet per minute, dramatically more than any consumer product, and this is what makes professional blow-outs take just 15 to 20 minutes for a dog that would take hours with weaker equipment. These units cost anywhere from $150 to $400 or more.
Mid-range pet dryers, often marketed as “force dryers” for home use, produce noticeably less airflow than professional units but still considerably more than a standard human hair dryer, typically enough to make blowing out a Golden’s coat achievable in 45 minutes to an hour with good technique.
Standard human hair dryers can technically be used, but they lack the airflow volume to penetrate deeply into a Golden’s dense undercoat efficiently. They can supplement the process, particularly for finishing touches on feathering around the legs and tail, but they’re not well suited as the primary tool for how to blow out a Golden Retriever coat at home if you’re aiming for genuinely thorough results.
If you’re specifically working with a hair dryer not designed for pets, our guide on using a human hair dryer safely on thick-coated breeds covers the heat and distance precautions that apply here too, since the same burn risk considerations matter regardless of breed.
Comparison Table: Equipment Options for Blowing Out a Golden Retriever Coat
| Equipment | Airflow Strength | Time Needed | Cost | Best For |
|---|---|---|---|---|
| Professional high velocity dryer | Very high (4,000-8,000 FPM) | 15-20 minutes | $150-$400+ | Regular use, multiple dogs |
| Mid-range force dryer | Moderate-high | 45-60 minutes | $60-$150 | Occasional home use |
| Standard human hair dryer | Low | 90+ minutes, less thorough | Already owned | Supplemental use only |
| No dryer, brush only | None | Doesn’t achieve blow-out effect | Free | Regular maintenance, not deep deshedding |
Step-by-Step: How to Blow Out a Golden Retriever Coat at Home
Here’s the actual technique, broken into stages that replicate what a professional groomer does during a salon blow-out session.
Step 1: Bathe First, Ideally With a Deshedding Shampoo
Blowing out a coat works best on a freshly washed coat, since bathing itself loosens some undercoat and removes surface dirt and oil that can interfere with air penetration. A deshedding shampoo adds an extra loosening effect, though our guide on how often to use deshedding shampoo on a Lab applies almost identically to Goldens — don’t overdo frequency, since the same skin dryness risk applies to this breed too.
Step 2: Towel-Dry to Remove Excess Water First
Don’t start the blow-out process on a soaking wet coat. Towel-dry thoroughly to a damp state first, which reduces total blow-out time significantly and makes the forced air more effective at reaching the undercoat rather than just evaporating surface water.
Step 3: Section the Coat and Work Systematically
Divide the coat mentally into sections — neck and shoulders, back, sides, hindquarters, and the feathered areas on the legs, chest, and tail. Working through sections systematically, rather than randomly moving the dryer around, ensures even coverage and prevents missing dense pockets of undercoat.
Step 4: Direct Airflow Against the Direction of Hair Growth
This is the core technique for how to blow out a Golden Retriever coat at home. Point the dryer nozzle so air blows against the natural lay of the coat, lifting hair up and outward rather than flattening it down. Combine this with simultaneous brushing using a slicker brush or undercoat rake in the same section, working through the coat as the air separates it.
Step 5: Watch for the Undercoat Release
You’ll know the technique is working when you start seeing genuine clouds of loose undercoat lifting away from the body and either floating off or catching in the brush. This is the specific visual confirmation that separates an effective blow-out from simply drying the coat.
Step 6: Pay Extra Attention to Feathering Areas
Golden Retrievers carry longer, feathered fur on the backs of the legs, the chest, the tail, and the ears. These areas hold significant undercoat too, but the longer guard hair here makes it easy to miss loose undercoat trapped underneath. Take extra time in these spots specifically, since they’re commonly under-addressed even during otherwise thorough sessions.
Step 7: Finish With a Full-Body Brush-Through
Once the entire coat has been blown out section by section, do one more complete pass with a slicker brush to catch any remaining loose hair the air missed, particularly in transition areas between sections that might have gotten less thorough coverage.
How Long Does It Actually Take to Blow Out a Golden Retriever Coat at Home?
This depends heavily on equipment, but realistic expectations matter for anyone attempting this for the first time. With a genuine high velocity dryer, expect 20 to 30 minutes for a thorough session. With a mid-range force dryer, closer to 45 minutes to an hour. With a standard hair dryer supplementing manual brushing, the process can stretch beyond 90 minutes and still not achieve quite the same thoroughness as stronger airflow equipment.
None of these timeframes are wasted effort, though. Even a longer, less powerful session removes considerably more loose undercoat than a standard bath and towel-dry ever would, since the core principle — forced air against the grain combined with simultaneous brushing — works regardless of exactly how much airflow power you’re working with.
Common Mistakes That Undermine How to Blow Out a Golden Retriever Coat at Home
Skipping the pre-bath step and blowing out a dry, unwashed coat. This misses the loosening benefit bathing provides and leaves natural oils and debris interfering with air penetration.
Directing airflow with the coat’s natural direction instead of against it. This is the single biggest technique error, and it turns a blow-out session into essentially just an ordinary drying session with extra noise.
Rushing through sections without simultaneous brushing. Air alone loosens hair, but brushing while the air works is what actually pulls that loosened hair free and away from the body rather than letting it resettle back into the coat.
Neglecting the feathered areas. These spots are commonly under-addressed since the longer guard hair here can visually mask how much undercoat still needs attention underneath.
Using too much heat, especially with a human hair dryer standing in for proper equipment. Keep heat settings low or cool throughout, since prolonged forced air sessions with high heat significantly increase skin irritation and burn risk over an extended session.
Not checking in on your dog’s comfort level throughout. Blow-out sessions take considerably longer than a quick towel dry, and dogs unfamiliar with the sensation may need breaks, treats, and patience built into the process, especially during the first few attempts.
Angela’s Story — Replacing Salon Visits With a Home Blow-Out Routine
One of the pet owners in our community, Angela, has a Golden Retriever named Sunny and used to schedule a professional deshedding blow-out every six weeks specifically to manage Sunny’s shedding, since her at-home bath and brush routine never seemed to make much of a dent in the sheer volume of hair Sunny produced between appointments.
After pricing out how much these regular professional sessions added up to annually, Angela decided to invest in a mid-range force dryer and learn the technique herself. Her first attempt took nearly ninety minutes and felt genuinely overwhelming — Sunny wasn’t used to standing still for that long, and Angela wasn’t yet confident with directing airflow against the coat’s natural direction.
By the third or fourth attempt, both Angela and Sunny had adjusted considerably. Sessions dropped to around fifty minutes, Sunny settled into the process more calmly once it became a familiar routine, and the amount of loose undercoat Angela collected each time genuinely rivaled what she remembered from Sunny’s professional appointments. She still takes Sunny in for a full groom periodically, but the twice-monthly at-home blow-out sessions have replaced what used to be a recurring salon expense, while keeping shedding around the house noticeably more manageable between visits.
🐾 An Angle Most Blow-Out Guides Skip Entirely
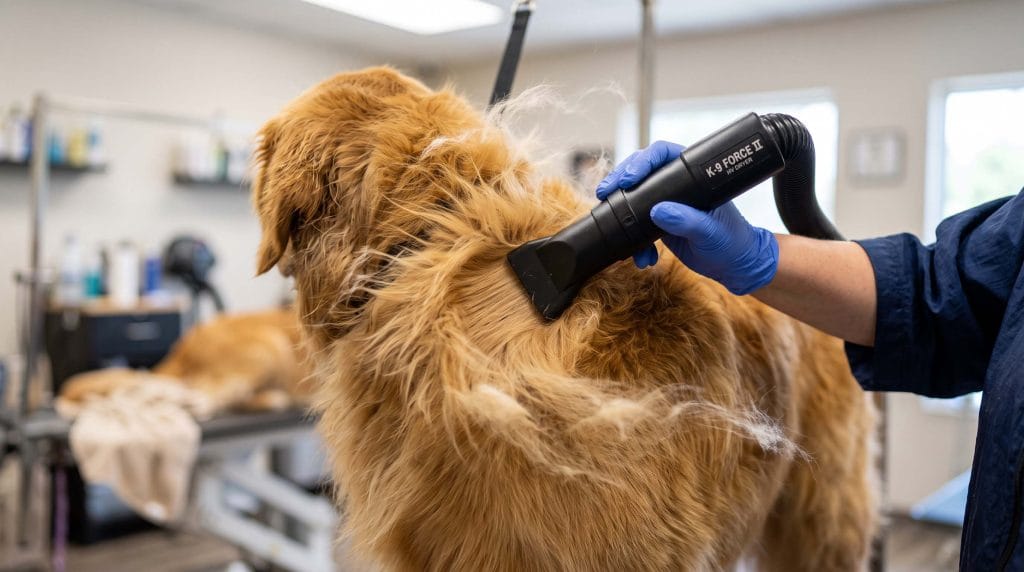
Here’s something that rarely gets mentioned: the angle you hold the dryer nozzle relative to the coat matters almost as much as the direction of airflow itself. Holding the nozzle flat against the coat surface concentrates air into a narrow path and can miss the deeper undercoat entirely, essentially blowing air across the top rather than into the coat structure. Angling the nozzle slightly upward, so air pushes underneath the guard coat and lifts it away from the body as it passes through, dramatically improves how effectively the undercoat actually gets separated and ejected.
This small adjustment — nozzle angled up and slightly against the direction of the coat, rather than held flat and parallel to the surface — is something professional groomers do almost automatically after years of practice, but it’s rarely explained clearly to owners attempting this technique for the first time at home. Practicing this angle specifically, even just experimenting with a few different positions during your first session, makes a noticeable difference in how much loose hair actually comes free.
Best Practices for a Consistent Blow-Out Routine
- Blow out the coat every four to six weeks during normal shedding, increasing to every two to three weeks during spring and fall coat blow seasons.
- Always bathe first, ideally with a deshedding shampoo used at the appropriate frequency to avoid skin dryness.
- Invest in the strongest dryer your budget allows, since airflow strength directly determines both session time and thoroughness.
- Brush simultaneously with airflow, never relying on air alone to do the full job.
- Give extra attention to feathered areas on the legs, chest, tail, and ears where undercoat commonly hides.
- Build in breaks for dogs unfamiliar with the process, especially during the first several sessions.
For a complete picture of managing a Golden Retriever’s shedding beyond just the blow-out technique, our guides on Golden Retriever shedding management, drying a double-coated dog without a high velocity dryer, and our complete shedding management guide round out a full routine that keeps shedding under control between blow-out sessions.
Tools Worth Having for At-Home Blow-Outs
- A mid-range or high velocity force dryer — the single most important investment for this technique to actually work
- A slicker brush — used simultaneously with airflow to pull loosened hair free
- An undercoat rake — useful for particularly dense areas like the neck and hindquarters
- A deshedding shampoo — improves pre-blow-out loosening when used at appropriate frequency
- A grooming table or non-slip surface — keeps your dog stable and comfortable during longer sessions
What’s Changing in At-Home Blow-Out Equipment
Consumer pet dryer technology has improved significantly in recent years, with several mid-range models now approaching airflow strength that used to be exclusive to professional-grade equipment, at price points considerably more accessible than they were even a few years ago. Noise reduction has also become a notable focus area, since many dogs find the volume of high-airflow dryers stressful, and quieter motor designs have made the blow-out experience considerably more comfortable for sensitive dogs without sacrificing airflow power.
Grooming educators have also started producing more detailed technique content specifically for home use, moving beyond generic “dry your dog” advice toward the kind of section-by-section, angle-specific guidance covered throughout this article. This reflects growing recognition that equipment alone doesn’t guarantee results — technique matters just as much, if not more.
Key Takeaways for Blowing Out a Golden Retriever’s Coat
- Bathe first with a deshedding shampoo used at appropriate frequency
- Towel-dry to damp before starting the blow-out process
- Direct airflow against the direction of hair growth, not with it
- Brush simultaneously with airflow rather than relying on air alone
- Work systematically through sections, including feathered areas
- Angle the dryer nozzle slightly upward to lift the guard coat and reach undercoat
- Finish with a full-body brush-through to catch any remaining loose hair
- Repeat every 4-6 weeks normally, more often during seasonal coat blows
FAQ — How to Blow Out a Golden Retriever Coat at Home
What equipment do I need to blow out a Golden Retriever coat at home?
A high velocity or mid-range force dryer produces enough airflow to make this technique effective. A standard human hair dryer can supplement but generally lacks the power to penetrate a Golden’s dense undercoat efficiently on its own.
How often should I blow out my Golden Retriever’s coat?
Every four to six weeks during normal shedding works well, increasing to every two to three weeks during the heavier spring and fall seasonal coat blows.
Why does blowing out remove more hair than just brushing alone?
Forced air directed against the coat’s natural growth direction physically separates and ejects loose undercoat from deep within the coat structure, reaching hair that brushing alone often can’t fully dislodge.
Is blowing out a Golden Retriever’s coat at home as effective as a professional groomer’s session?
With strong enough equipment and proper technique, home blow-outs can achieve results very close to professional sessions, though professional high velocity dryers typically complete the process faster due to significantly stronger airflow.
Can I use a regular hair dryer instead of buying pet-specific equipment?
You can, but expect a considerably longer session and less thorough results, since standard hair dryers produce far less airflow volume than dedicated pet or force dryers designed for this specific technique.
Making Blow-Outs Part of Your Routine
How to blow out a Golden Retriever coat at home comes down to the right equipment, correct airflow direction, and simultaneous brushing working together to physically remove loose undercoat rather than just drying the surface. It takes practice and patience, especially in the first few sessions, but once the technique clicks, it becomes one of the most effective tools available for managing a Golden’s substantial shedding volume.
For the full picture of coat care alongside this technique, check out our guides on Golden Retriever shedding management, how often to use deshedding shampoo, drying a double-coated dog without a high velocity dryer, and our complete shedding management guide to build a routine that keeps your Golden’s coat healthy and your home considerably less covered in loose hair. 🐾
This article provides general grooming guidance for informational purposes. Always monitor your dog’s comfort during longer grooming sessions, and consult a professional groomer or veterinarian if you notice skin irritation or excessive stress during the process.
