

 Animal Zoid Editorial Team
 Quick Answer
⚡ Quick Answer
How to clean dog hair from a Roomba filter correctly: Remove the filter from the bin, tap it firmly against the inside of a trash can to dislodge compacted hair and debris, then use a dry cleaning brush or old toothbrush to sweep remaining fibres off the pleated surface — never wash it with water or compressed air, both of which destroy the filter permanently. Done right, this takes under three minutes and restores full suction immediately.
Your Roomba was supposed to solve the dog hair problem. And for a while, it did. But somewhere between the second and third week of running it daily through Husky season, the suction dropped, the cleaning runs started taking longer, and your floors stopped actually looking clean when it finished. The culprit is almost always the filter — specifically, dog hair and fine undercoat fibres that have packed themselves so densely into the pleated filter surface that air can barely pass through anymore.
Knowing how to clean dog hair from a Roomba filter correctly is the single most impactful maintenance task for any dog owner running a Roomba regularly. It’s faster than most people expect, but there’s a specific method that works and several approaches that actively destroy the filter while appearing to clean it. This guide covers the full process — how the filter actually works, why dog hair clogs it faster than regular household dust, the correct step-by-step cleaning method for every current Roomba filter type, what mistakes ruin filters permanently, and how often to clean based on your dog’s shedding level.
If shedding volume is what’s sending you to clean this filter every few days, our guides on how to stop Husky shedding, German Shepherd shedding, Golden Retriever shedding, and our complete dog shedding management guide tackle the problem at the source. And if you’re also dealing with dog hair destroying your upright vacuum’s roller brush, our guide on how to clean dog hair out of a Dyson roller brush covers the same systematic approach for that specific problem.
How to Clean Dog Hair From a Roomba Filter Correctly — Understanding the Filter First
Why Dog Hair Clogs a Roomba Filter Differently Than Regular Dust
Before the cleaning steps make full sense, it helps to understand what’s actually happening inside that filter — because how to clean dog hair from a Roomba filter correctly depends entirely on understanding why dog hair behaves so differently from standard household dust.
Roomba filters — specifically the High-Efficiency filters used across the i Series, j Series, s Series, and 600 Series — use a pleated design with extremely fine filtration media folded into a compact accordion structure. This design creates a large surface area in a small space, which is how the filter captures particles as small as 10 microns while maintaining airflow. The pleated structure works brilliantly for fine dust, dander, and standard household debris.
Dog hair is a different problem entirely. Individual shed hairs don’t just sit on the filter surface the way dust particles do — they weave between the pleats, wrap around the folded edges, and compress into dense mats inside the pleated channels where standard tapping can’t easily dislodge them. Fine undercoat fibres from double-coated breeds like Huskies, German Shepherds, and Samoyeds are especially problematic. These fibres are short enough to penetrate deep into the pleat channels rather than collecting on the outer surface, and they carry static charge that bonds them to the filter media electrostatically as well as physically.
The result is a filter that looks relatively clean from the outside but is severely restricted internally — which is exactly how to clean dog hair from a Roomba filter correctly becomes more nuanced than simply tapping the filter over a bin. The cleaning method needs to address both surface accumulation and the compacted hair inside the pleated channels.
This is also connected to the same static and scale mechanics we covered in our guide on why dog hair sticks to everything even after washing — the microscopic scale structure on dog hair shafts interlocks with surrounding surfaces, including filter media, which is why hair packs so densely rather than loosening easily under airflow.
How to Clean Dog Hair From a Roomba Filter Correctly — What You Need
Tools That Make Cleaning a Roomba Filter Safe and Effective
Getting how to clean dog hair from a Roomba filter correctly right starts with having the right tools. The good news is that you don’t need anything expensive or specialist — but you do need the right combination.
A stiff dry cleaning brush or old toothbrush — the primary tool for working hair out of the pleated channels. The brush needs to be completely dry. Any moisture on the bristles transfers to the filter media, which weakens the filtration fibres and can cause tearing. A dedicated cleaning brush is better than a toothbrush because the stiffer, denser bristles cover more of the pleat surface per stroke.
A trash can or bin with a firm edge — for the initial tapping step. You need a solid surface to tap the filter against firmly. The inside edge of a rigid trash can works perfectly — firm enough to dislodge compacted hair without risking filter damage from too much force.
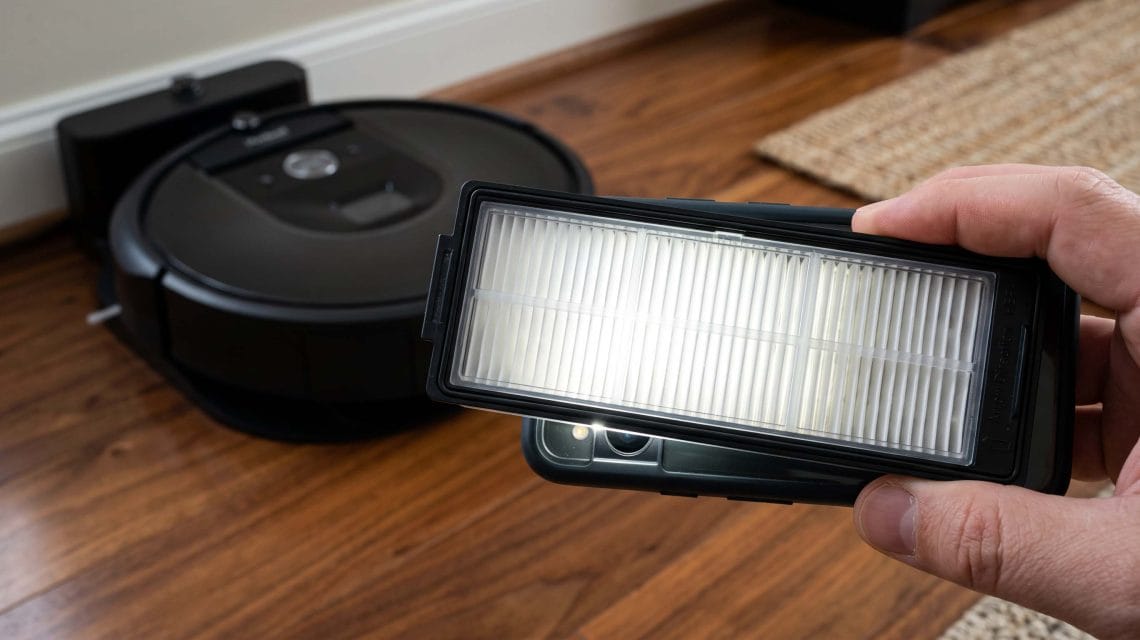
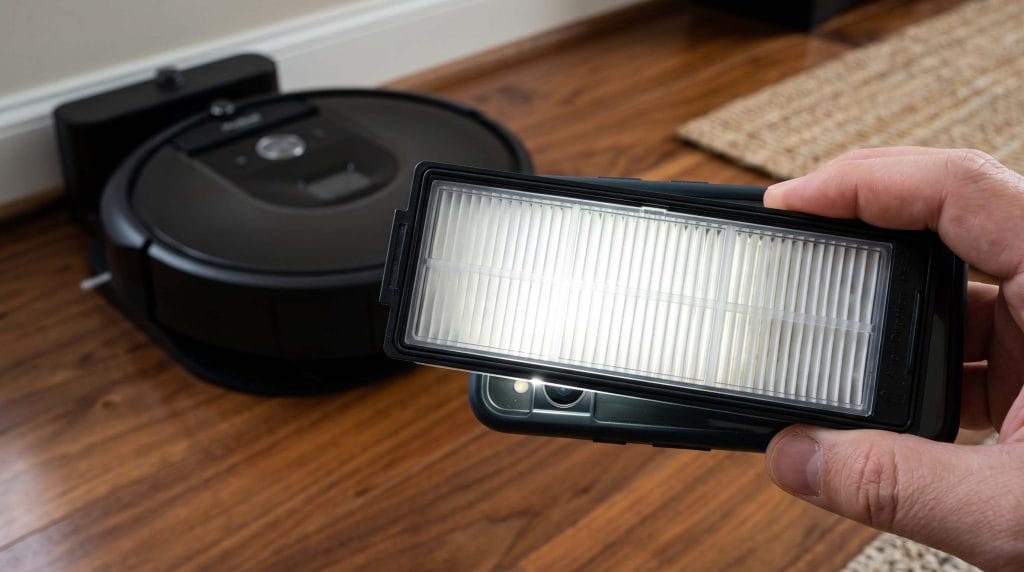
A small flashlight or phone torch — genuinely useful for inspecting the pleated channels after cleaning. The channels are narrow and dark, and it’s easy to miss compacted hair sitting deep between pleats without direct light. A thirty-second inspection with a torch after cleaning tells you whether the filter is actually clear or whether it needs another brush pass.
A soft lint-free cloth — for wiping the exterior filter housing and the bin cavity after filter removal. Dog hair accumulates in the bin seams and around the filter housing edges, and cleaning the filter while leaving the surrounding area hair-packed reduces the effectiveness of the clean.
What you don’t need and should never use:
Water. Compressed air from a canister. A vacuum to clean the Roomba filter. These three approaches come up constantly in general robot vacuum maintenance advice and all three damage Roomba filters in different ways — we’ll explain exactly why in the mistakes section below.
How to Clean Dog Hair From a Roomba Filter Correctly — Full Step-by-Step
The Complete Method for How to Clean Dog Hair From a Roomba Filter Correctly
Follow this sequence every time you clean the filter. The order matters — particularly doing the tapping step before the brush step, which makes the brush work significantly more effective.
Step one — Run the Roomba until it docks or the bin is full, then wait ten minutes.
Cleaning the filter immediately after a run means the filter is warm and any fine dust or dander is still slightly airborne inside the unit. Waiting ten minutes allows everything to settle, which reduces how much debris becomes airborne when you remove the filter — particularly relevant if anyone in the household has dust or pet dander allergies.
Step two — Remove the dustbin from the Roomba.
Press the bin release button on your specific model — the location varies between the 600 Series (rear release), i Series and j Series (front-facing release tab), and s Series (side release). Pull the bin out completely. Take the entire unit outdoors or directly to a trash can before opening the bin or removing the filter — this prevents loose hair from scattering back across the floor you just cleaned.
Step three — Empty the bin contents before removing the filter.
Open the bin door and empty the collected hair and debris into the trash. On models where the filter is accessible from inside the bin (most i Series and j Series models), remove the filter after emptying rather than before. This sequence prevents loose bin contents from embedding further into the filter media during removal.
Step four — Remove the filter.
On the 600 Series, the yellow-framed filter pulls out from the side of the bin. On the i Series and j Series, the filter pulls upward from inside the bin cavity. On the s Series, the filter assembly removes from the top of the dustbin. Handle the filter by its frame rather than the pleated media surface — finger oils and pressure can compress the pleats and restrict airflow if you grip the filtration surface directly.
Step five — Tap the filter firmly against the inside edge of the trash can.
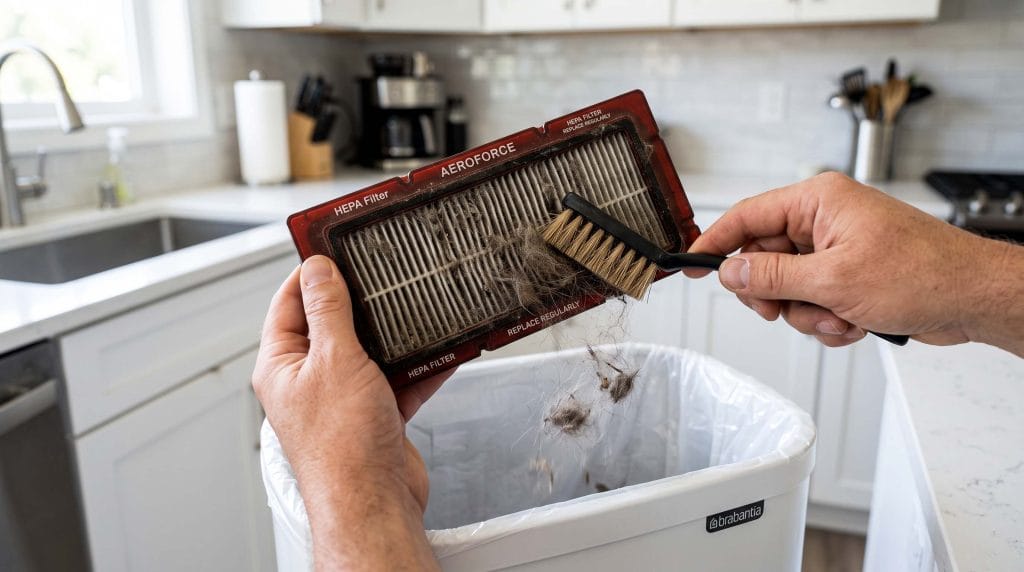
Hold the filter by its frame with the pleated surface facing into the bin. Tap the frame edge firmly against the rigid inside edge of the trash can — not the plastic bag, which absorbs impact, but the firm bin wall itself. Tap in a steady rhythm: three taps on one long edge, rotate the filter 90 degrees, three taps on the adjacent edge, rotate again, three taps. This four-direction tapping pattern dislodges compacted hair from all sections of the pleated channels rather than just the section closest to the impact point.
You’ll see a visible cloud of fine hair and dust releasing from the filter during this step. That’s exactly what should happen — the compacted hair inside the pleated channels is loosening and falling away. Continue tapping until the visible release reduces significantly.
Step six — Brush the pleated surface with the dry cleaning brush.
After tapping, hold the filter at an angle over the bin and run the dry cleaning brush along the pleated surface in short strokes parallel to the pleat direction — following the length of each fold rather than across them. Brushing across the pleats pushes hair deeper into the channels. Brushing along them lifts remaining hair toward the filter edge where it can fall away.
Work systematically across the entire pleated surface — both the front and back faces of the filter. On the i Series High-Efficiency filter, pay particular attention to the edges of the filter frame where pleats meet the housing, as compacted hair accumulates heavily in those corners.
Step seven — Inspect the pleated channels with a torch.
Shine your phone torch directly into the pleated channels at an angle. Look specifically at the channel depth — clear channels show the filter backing material at the bottom. Channels with remaining compacted hair appear darker and shallower. Any channels that still look blocked need another brush pass or additional targeted tapping before the filter goes back in.
Step eight — Wipe the bin cavity and filter housing.
Before reinserting the filter, use a dry lint-free cloth to wipe the inside of the bin cavity and the filter housing area. Dog hair accumulates in the seams and ridges around the filter housing, and leaving it there means it immediately begins restricting the filter again on the next run. This step adds thirty seconds to the process and meaningfully extends the time between the next filter clean.
Step nine — Reinsert the filter and reinstall the bin.
Slide or press the filter back into its housing until it seats firmly — you should feel or hear a light click on most models indicating full seating. Reinstall the bin into the Roomba until it clicks into place. Run a short test cycle to confirm normal suction performance has returned.
How Often to Clean Dog Hair From a Roomba Filter Correctly Based on Shedding Level
Matching Your Cleaning Schedule to Your Dog’s Actual Shedding Volume
iRobot’s standard recommendation is to clean the filter once a week and replace it every two months. That schedule works for households without pets. For dog owners — particularly those with medium to heavy shedding breeds — the filter needs attention significantly more frequently.
Here’s the realistic schedule based on breed shedding levels:
| Dog Breed Type | Shedding Level | Filter Clean Frequency | Filter Replace Frequency |
|---|---|---|---|
| Low-shedding breeds (Poodle, Bichon, Maltese) | Low | Every 1–2 weeks | Every 2–3 months |
| Moderate shedding (Beagle, Boxer, Dalmatian) | Medium | Twice weekly | Every 6–8 weeks |
| Heavy shedding (Labrador, Corgi, Border Collie) | High | Every 2–3 days | Every 4–6 weeks |
| Double-coated breeds (German Shepherd, Golden Retriever) | Very High | Daily or every other day | Every 3–4 weeks |
| Nordic breeds during coat blow (Husky, Samoyed, Malamute) | Extreme | After every run | Every 2–3 weeks |
During peak shedding seasons — spring coat blow and fall coat blow — we recommend checking the filter after every single Roomba run regardless of breed. A quick thirty-second inspection after emptying the bin tells you whether the filter needs a full clean or whether it can run another cycle. Letting a clogged filter run reduces cleaning performance and puts unnecessary strain on the Roomba’s motor.
For Husky and Malamute owners during active coat blow, the filter can reach full restriction in a single cleaning run across one room. If you’re managing a Nordic breed through peak shedding season, our Husky shedding guide covers the deshedding routine that reduces what reaches your floors — which directly reduces how often you’re cleaning the filter. Pair that with consistent brushing sessions from our Corgi shedding guide if you have multiple breeds contributing to the hair load.
Mistakes That Ruin a Roomba Filter While Trying to Clean Dog Hair
What Destroys Filters When You Try to Clean Dog Hair From a Roomba Filter Incorrectly
These mistakes come up constantly in general robot vacuum advice — and each one either fails to clean the filter effectively or causes permanent damage that forces early replacement.
Washing the filter with water. This is the most common and most damaging mistake. Roomba High-Efficiency filters use HEPA-style filtration media — a fine fibre mat that depends on its structure to capture particles. Water collapses those fibres, destroying the filter’s ability to capture fine particles even after complete drying. The filter may look clean after washing and drying. It won’t filter effectively. iRobot explicitly states these filters are not washable — and that instruction exists because washing genuinely destroys them.
Using compressed air from a canister. Compressed air seems logical — blow the hair out rather than brushing it out. The problem is that compressed air pressurises the filter media from one direction, which forces fine particles and hair fibres deeper into the filtration layers rather than removing them. It also risks tearing the delicate filter media at the pleat edges. The result is a filter that’s no cleaner — and potentially structurally damaged.
Using another vacuum to clean the Roomba filter. Running a handheld vacuum or the suction nozzle of an upright vacuum across the Roomba filter seems efficient. In practice, the suction force applied directly to the pleated surface pulls and stretches the filtration media unevenly, creating weak points that tear during subsequent use. It also rarely reaches hair compacted deep in the pleat channels — where most of the restriction actually sits.
Tapping too hard against a hard surface. Tapping firmly against the inside of a trash can is correct. Tapping with significant force against a concrete floor, tiled surface, or the outside edge of a bin can crack the plastic filter frame — which breaks the seal between filter and housing and means unfiltered air bypasses the filter entirely on subsequent runs.
Reinstalling the filter while the bin is damp. If you wiped the bin with a damp cloth, allow it to dry completely before reinserting the filter. A damp bin cavity introduces moisture to the filter media during the next run, which weakens the filtration fibres over multiple cycles.
🔧 The Two-Filter Rotation System — What Smart Roomba Owners Actually Do
After working through filter maintenance across households with heavy shedding breeds, we developed a simple system that makes how to clean dog hair from a Roomba filter correctly less of a daily interruption — and it’s surprisingly underused.
Buy two filters and rotate them.
Keep one filter in the Roomba running. Keep a second clean filter ready beside the dock. When you empty the bin after a run — which for heavy shedding households should happen after every run — swap the used filter for the clean one immediately and take the used filter to clean at your convenience rather than cleaning it right then.
Here’s why this works so well. The most common reason people skip filter cleaning is time pressure — the Roomba finishes a cycle, you check the bin, realise the filter needs cleaning, and either put the dirty filter back in (reducing next-run performance) or clean it right then when you have ten other things to do. The two-filter rotation removes that pressure entirely. The Roomba always goes back with a clean filter. The used filter gets properly cleaned when you have a moment.
This approach extends individual filter life because each filter gets adequate recovery time between cleans rather than being repeatedly cleaned and immediately reloaded. And it ensures the Roomba always runs at full suction performance — which directly translates to better hair pickup on every run.
Pair this system with the deshedding routine from our German Shepherd shedding guide or Golden Retriever shedding guide, and you’re addressing the problem at both ends — less hair reaching the floor, and a vacuum that’s always operating at full capacity when it does its job.
Roomba Filter Maintenance — Complete Reference Checklist
Use this before and after every filter cleaning session:
After every Roomba run (heavy shedding breeds):
- Empty bin contents into trash immediately
- Quick visual check of filter surface — if visibly packed with hair, clean before next run
- Swap to second filter if using two-filter rotation system
Full filter cleaning session:
- Take bin outdoors or directly to trash can before opening
- Empty bin before removing filter
- Handle filter by frame only — not by pleated media surface
- Four-direction tapping against firm bin edge
- Dry brush along pleat direction on both filter faces
- Torch inspection of pleat channels — clear channels show backing material at bottom
- Wipe bin cavity and filter housing with dry lint-free cloth
- Confirm filter seats fully before reinstalling bin
- Never use water, compressed air, or vacuum suction on filter media
Filter replacement indicators:
- Visible tears or holes in pleated media
- Cracked or warped filter frame
- Suction doesn’t improve after thorough cleaning
- Filter has been in use beyond recommended replacement period for your shedding level
- Persistent odour after cleaning (hair and dander embedded beyond cleaning reach)
A Real Example — What Changed for One Samoyed Owner
Jennifer runs a Roomba j7+ in a home with two Samoyeds — breeds that produce extraordinary volumes of fine, white undercoat during coat blow season. For the first six months of ownership, she followed iRobot’s standard weekly filter cleaning guidance. Her Roomba was completing cleaning runs that took forty minutes longer than the app’s initial mapping suggested they should, and the floor still showed visible hair after each run.
The problem was twofold. First, weekly cleaning wasn’t close to frequent enough — her Samoyeds’ undercoat was packing the filter to near-full restriction within two or three runs, not within a week. Second, her cleaning method was tapping the filter twice against her palm and considering it done — which dislodged surface hair but left the pleat channels compacted.
After switching to after-every-run filter checks, the four-direction firm tapping method, and the dry brush pleat inspection, her Roomba’s run times dropped back to near the originally mapped duration within a week. She also implemented the two-filter rotation system, which meant she was no longer making the decision between running a clogged filter or stopping to clean it mid-routine.
The bigger shift came when she started a consistent deshedding routine during coat blow season — a professional high-velocity blow-out bath before peak shedding started, followed by daily brushing sessions during the heaviest weeks. The volume of undercoat reaching her floors dropped dramatically, and with it the frequency at which her Roomba filter needed attention. Knowing how to clean dog hair from a Roomba filter correctly solved the immediate maintenance problem. Reducing what the Roomba had to process made the whole system genuinely sustainable.
FAQ — How to Clean Dog Hair From a Roomba Filter Correctly
How to clean dog hair from a Roomba filter correctly without damaging the pleats?
Handle the filter by its plastic frame rather than touching the pleated media surface directly. Use the four-direction tapping method against a firm bin edge — three taps per side, rotating 90 degrees between each set — then brush along the pleat direction with a dry cleaning brush, never across it. Never apply water, compressed air, or vacuum suction directly to the filter media. These three approaches all damage the pleated structure while appearing to clean it.
Can I wash a Roomba filter to remove dog hair?
No — and this matters enough to say clearly. iRobot High-Efficiency filters use HEPA-style filtration media that water destroys by collapsing the fine filtration fibres. The filter may look clean after washing and drying but won’t filter fine particles or dog dander effectively. Washing also risks warping the plastic filter frame, which breaks the air seal and means unfiltered air bypasses the filter during operation. Dry cleaning only — tapping and brushing.
How to clean dog hair from a Roomba filter correctly when hair is deeply compacted in the pleats?
For severely compacted filters, extend the tapping phase — work through the four-direction rotation twice rather than once, using a firm, consistent tap rhythm. Follow with two full brush passes along the pleat direction rather than one. Use the torch inspection between each pass to check whether channels are clearing. If the filter still shows significant restriction after two rounds of this process, it’s likely due for replacement — filters that have been running compacted for extended periods develop permanent flow restriction that cleaning can’t reverse.
How often should I replace the Roomba filter if I have a heavy shedding dog?
For double-coated breeds and Nordic breeds during coat blow season, replace the filter every three to four weeks rather than iRobot’s standard two-month recommendation. Signs that a filter needs replacing rather than cleaning: visible tears in the pleated media, a cracked or warped frame, suction that doesn’t improve after a thorough clean, or persistent odour after cleaning. For context, the cost of a replacement filter is significantly less than the cost of motor repair from running the Roomba repeatedly with a severely restricted filter.
Does cleaning the Roomba filter help with dog odour in the house?
Yes — meaningfully so. A clogged filter stops capturing pet dander and fine hair particles effectively, which means the Roomba re-circulates those particles into the air during cleaning runs rather than trapping them. Dog odour in homes is largely carried by dander particles and shed skin cells — both of which the High-Efficiency filter captures when clean but passes when clogged. Regular filter cleaning combined with bin emptying after every run keeps the Roomba acting as an air quality improvement tool rather than an air quality neutral one.
The Bottom Line
How to clean dog hair from a Roomba filter correctly is a five-minute process when you do it right — and it’s the single highest-impact maintenance task for any dog owner running a Roomba regularly. The four-direction tap, the dry brush along the pleat direction, the torch inspection, and the clean bin cavity wipe: in that order, after every run for heavy shedders and at least every two to three days for moderate ones.
The two-filter rotation system removes the time-pressure barrier that leads to running on a clogged filter “just this once” — which becomes ten times in a row and ends with a motor working far harder than it should. And reducing shedding at the source through consistent deshedding means the filter handles a manageable load rather than fighting a losing battle against coat blow season.
Clean the filter today — it takes three minutes and the suction difference is immediate. Then build the deshedding routine that keeps the load manageable. Explore our guides for Huskies, German Shepherds, Golden Retrievers, Labradors, and Corgis — or get the complete picture with our dog hair management guide. A Roomba that runs at full power and a dog that sheds less is the combination that actually keeps your floors clean. 🐾
This article provides general robot vacuum maintenance guidance for informational purposes. Always refer to your specific Roomba model’s manual before disassembling components or performing maintenance beyond standard cleaning.
